

Hello fellow pin lovers! YES, we are alive! We are cringing at the fact that our last post was January 30th (Eeeeeekk!). But, with the onset of spring there are a ton of DIY projects that we have high hopes of taking on and of course sharing with you.
Since our last post, we have been published in Capital Style Magazine! The February issue was a double whammy of accomplishments. One of my MISA ME Photography images was selected to be the COVER! Second, we were able to feature an clever DIY bridal party gift. Here is a link to that issue jam packed with all things wedding.
On another note, how about a super easy DIY home decor project?
Its been 1 year since my husband and I moved into our home. There are so many design projects I'd love to tackle. I'm learning to take it one room at a time. I keep telling myself that with a little elbow grease and patience my house will one day feel like a home in the design and decor sense.
So here we go...dining room project #1! A little something I dreamt up after finding some old wood planks in our 1950s basement.
What you will need:
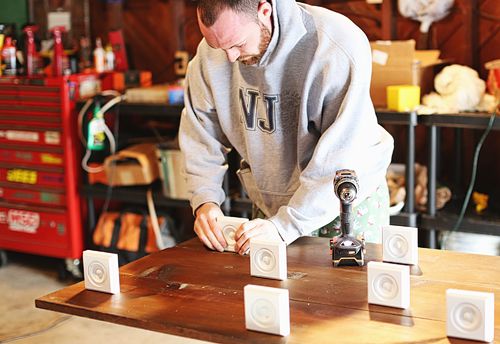
- wood planks (approx 1" thick -- as you can see in the before and after below, our boards need some cleaning)
- decorative moulding squares (super duper cheap @ Home Depot!)
- drinking glasses (The style and amount is up to you! I chose glassware from Marshall's - $2.99 each...score! - in two different sizes)
- pack of glass votives (easily found @ Michael's craft store!)


Step 1:
Lay out your wood planks on the floor as they will appear once hung on your wall. Strategically lay out the moulding squares on the planks (with the rosette facing downward). Take into account the number of glasses you'll be using and their heights!

Step 2:
Place a piece of tape directly above each moulding square to serve as a place holder.


Step 3:
After taping, remove the moulding squares and move your planks to a work station where you can begin drilling. To prep the moulding squares, drill a shallow hole using a screw driver into the backside of each. Then drill a hole where your moulding squares were once placed on the planks (on the bottom of your tape marker, not the top!)

Step 4:
Place all moulding squares back onto the planks making sure to line up the drill holes on the planks with the drill holes on the moulding squares. Grab your screw driver and begin securing each moulding square to the planks from the backside of each plank. Make sure each moulding square will be level so your glassware won't fall off!

Step 5:
Drill each individual plank (with moulding squares already attached) directly onto your wall. You will want to have a level on hand to make sure everything lines up properly! Place a votive in each of your glasses. Place each glass onto a moulding square and lite 'em up!


